WordPress 5.0 was created to update the editor used to work with the content for web pages and blog posts. This new editor is called the “Gutenberg” editor and aims to improve your editing experience.
Only ProPhoto 7 provides tools in the WordPress 5.0 “Gutenberg” editor. If you use ProPhoto 6 or earlier you must install the Classic Editor plugin to add, edit, or delete ProPhoto items in your page & post content (ProPhoto grids, galleries, etc.)
Anyone who has used the original WordPress page editor will find a lot of familiar features–headings, paragraphs, numbered lists, images, galleries, alignment controls, and plenty more are carried over into the Gutenberg editor. However, you may need to acquaint yourself with a few new concepts.
WORDPRESS BLOCKS
WordPress 5 follows in the footsteps of many other editor tools (including ProPhoto 6 and 7!) by providing “blocks” which divide the content into horizontal strips.
A block can be added to create a heading (using H1 through H6 styling), a text area (using paragraph styling), an image, a gallery, and lots more. Blocks can even be saved for reuse in other pages/posts, and can be divided into vertical columns to create interesting content layouts.
INSTALL THE CLASSIC EDITOR PLUGIN
ProPhoto 6 and earlier were not built to work with the “Gutenberg” editor, so you will need to install and activate the Classic Editor plugin when you need to do any of the following:
- add, edit or delete ProPhoto galleries in your pages/posts
- add, edit or delete ProPhoto grids in your pages/posts
- add, edit or delete ProPhoto forms in your pages/posts
After working with your ProPhoto items in a page/post, you may deactivate the Classic Editor plugin and return to using the new editor, if you want.
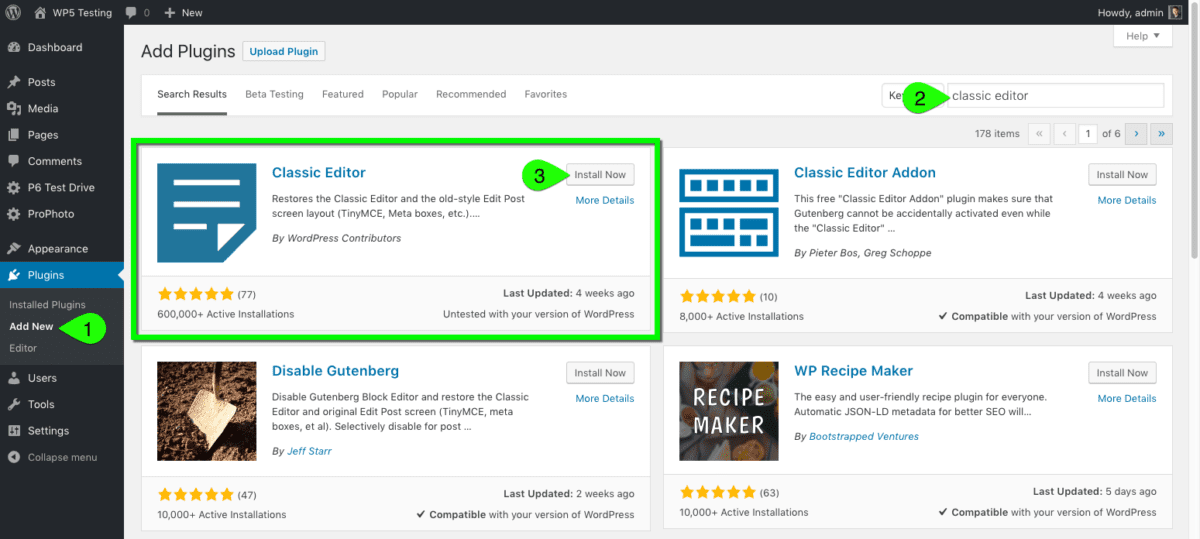
To install the Classic Editor plugin in WordPress:
- Login to WordPress and visit the “Plugins > Add New” screen.
- Search for “classic editor” in the plugin search box.
- Locate the plugin created by WordPress Contributors and click to install.
- After installation, click to activate the plugin.
See here for an example:
When the plugin is active, the new “Gutenberg” editor will be replaced with the original editor.
When the plugin is deactivated, the new “Gutenberg” editor will be used to create & edit the content of all WordPress posts & pages.
You may safely toggle between the classic and Gutenberg editors as needed.
Block Via ProPhoto Help