In the bustling world of digital content, where influencers, bloggers, and entrepreneurs are constantly expanding their online footprint, WordPress stands out as a premier platform. Powering nearly half of the world’s websites, its charm lies in its simplicity and intuitive design, making it the preferred choice for those who’d rather not tangle with code.
This brings us to the essential tool that simplifies WordPress website migration: the Backup Migration plugin. Selected for its clear interface and smooth way of use, this plugin allows users to conduct backups and migrations out of the box.
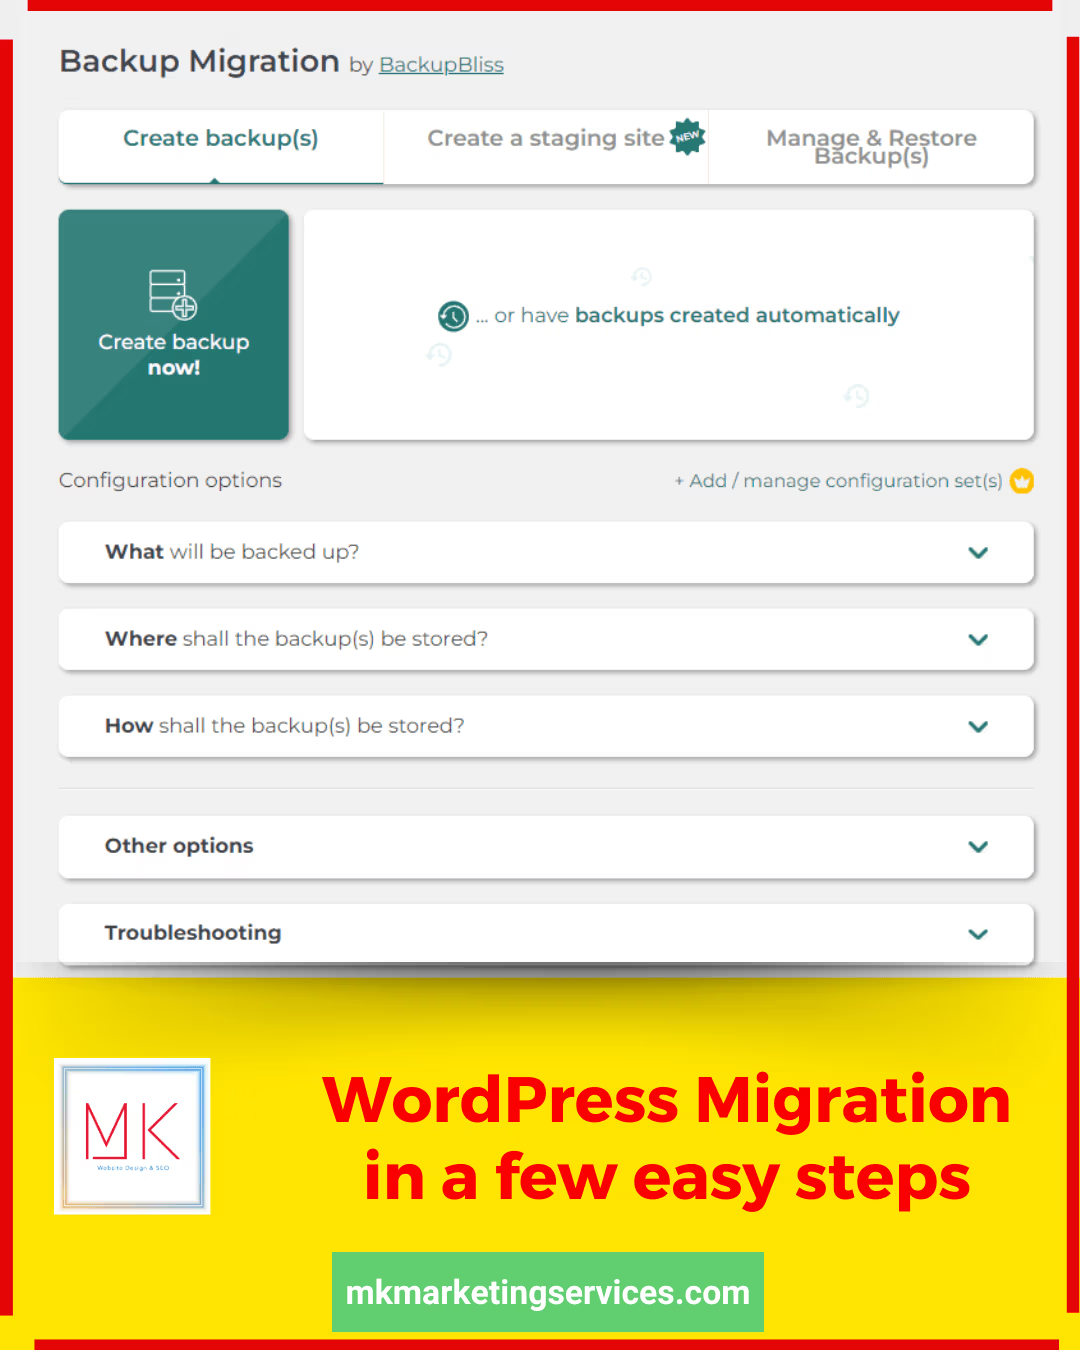
How to Backup Your WordPress Site Effortlessly
Step 1: Plugin Installation Start by installing the Backup Migration plugin directly from your WordPress Dashboard or download it from the WordPress plugin directory.
Step 2: Configure Your Backup Once activated, navigate to the plugin’s menu in your Dashboard. You can use pre-set, optimized backup selection, or simply include everything on your site.
Step 3: Create the Backup Hit the “Create backup now!” button. For smaller sites, this process is swift, wrapping up in just a few minutes. For larger sites, consider the plugin’s premium version. Don’t forget to download the backup file to your local storage for extra security.
Streamlining Your Site Migration
Step 1: Set Up the New Site Setting up a new WordPress instance is easier than ever with many hosting services, that offer automated WordPress installation. If your hosting doesn’t offer this, manually installing WordPress is still straightforward.
Step 2: Plugin Installation on the New Site Install the Backup Migration plugin on your new site, mirroring the setup from your original site.
Step 3: Restore Your Site Navigate to the “Manage & Restore Backup(s)” section:
- Super-quick migration: Ideal for domain changes. Enter the backup file’s URL and hit “Restore now!”
- Manual transfer: Upload the backup zip file and initiate restoration.
- External storage: Use this for cloud backups like Google Drive. Sync and restore directly from the “Manage & Restore Backups” section.
Final Step: Redirect Old Domain To maintain continuity, use the Redirection plugin to redirect traffic from your old domain to the new one efficiently.
Keeping Your Site Secure with Regular Backups
Post-migration, the key to a consistent online presence is ongoing maintenance. Automate your backups with the Backup Migration plugin to shield against unforeseen issues, selecting intervals that suit your workflow and keeping your site traffic unaffected.
Bonus: Creating a Staging Site
For those planning significant updates, the Backup Migration plugin offers staging site capabilities. Whether you choose to set up a subdomain or utilize an external server like TasteWP, staging sites provide a safe environment to test changes without impacting your live site.
Conclusion
Migrating your WordPress site doesn’t have to be a chore. With the Backup Migration plugin, it’s streamlined, supported, and secure, no matter the complexity of your site or the specifics of your hosting environment. Make your digital transitions as seamless as your content creations, and watch your online domain thrive.